Option Constrain:
Option Constraints refer to the rules or conditions that dictate how different product options can be combined or selected. These constraints help ensure that sales representatives and customers configure valid and viable product bundles or configurations.
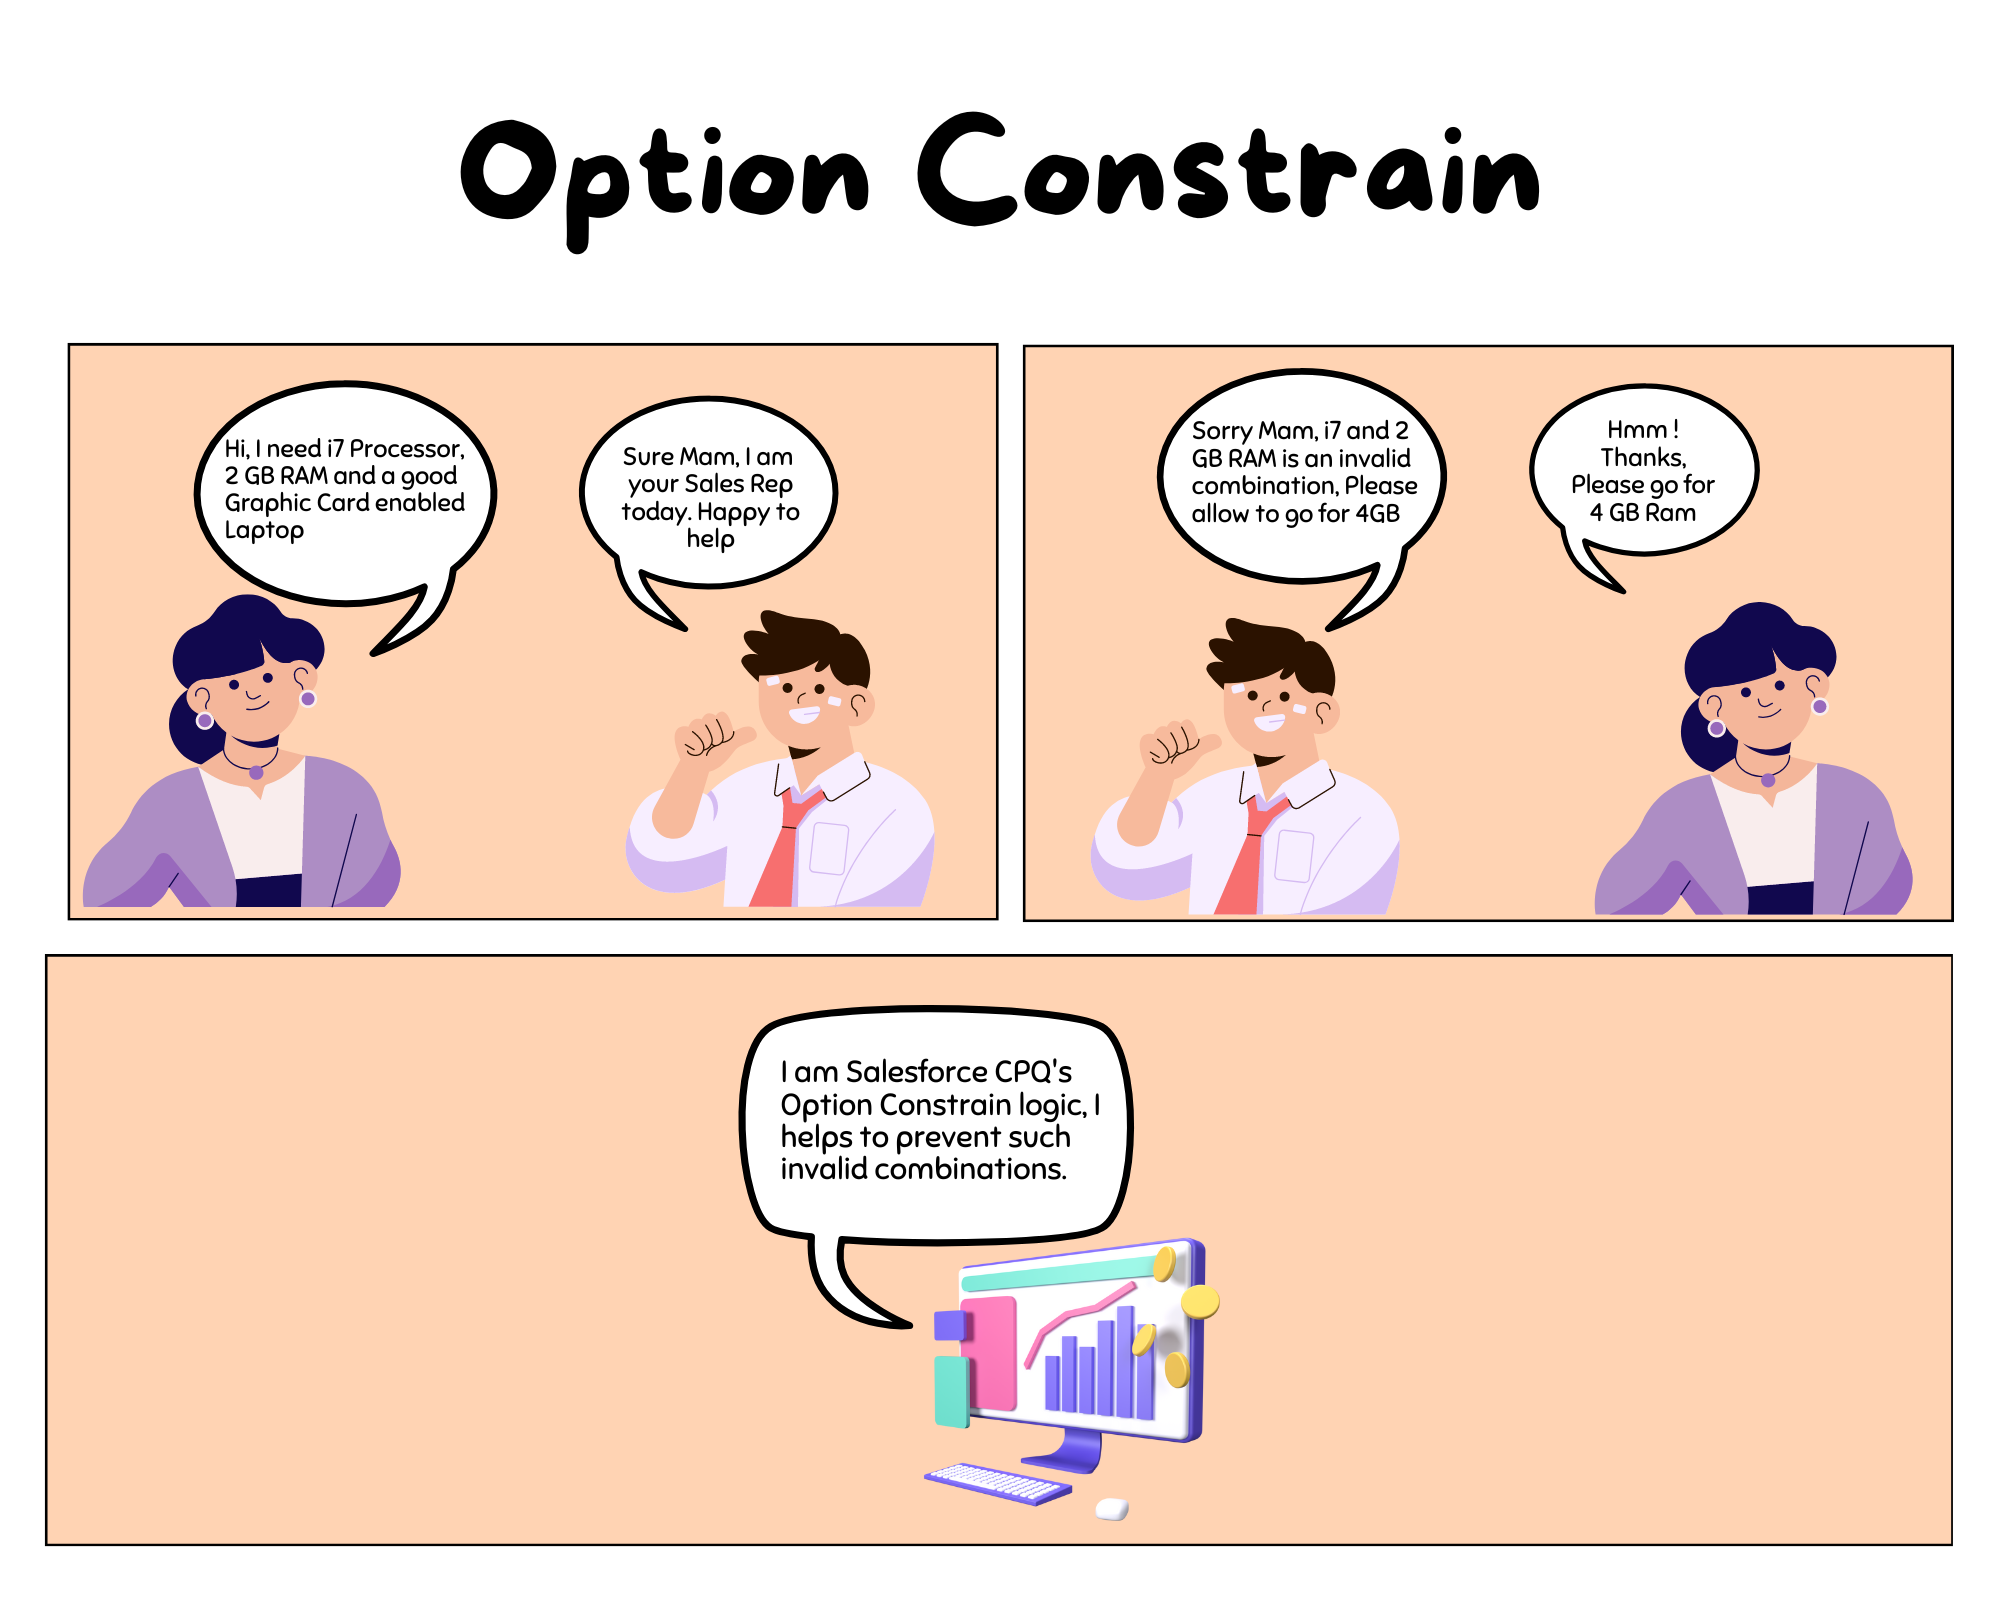
In the above image, the customer wants a combination of i7 and 3 GB RAM, Option Constrain (OC) prevents configuring this combination. This helps sales reps to ensure a valid product is sold as a bundle.
Some considerations of OC:
- OC is used to enforce Dependencies (Option A is required before Option B is selected).
- OC is used to enforce Exclusions (Option A and B are mutually exclusive).
- They do not worry about the quantities or any other parameters.
- It can either Enable or Disable an option.
- It cannot remove, select, hide, or show options automatically- we need a product rule for this.
- OC can examine multiple options with advanced grouping logic.
- OC only operates within the current bundle by default but can examine prior purchases.
Type of Option Constrain:
Based on its behavior OC are of two types -
- Dependency
- Exclusion
1. Dependency:
Dependency constraints make sure that when you choose a specific option, other related options are automatically adjusted to match the requirements or limitations associated with that choice. Dependency rules determine that the selection of one option depends on the selection of another option.
Example - To enable product A, product B is required. Let's understand this with the help of a use case.
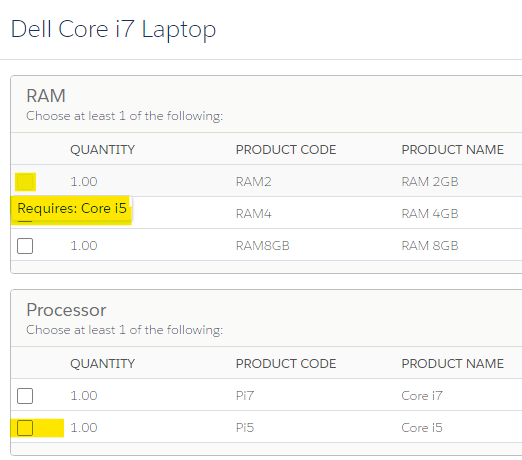
Use Case 1: In the Dell Core i7 Laptop bundle, the 2 GB RAM option is only available with i5 processor, and Graphic Card UHD 730 is also available with i5 processor only.
Pre-requisites: Please check the How to Create Bundle blog before following the configuration steps.
Steps to configure Dependency OC (Basic Setup):
- Create a bundle product - Dell Core i7 Laptop. It should have the following child products -
- RAM 2GB
- RAM 4GB
- RAM 8GB
- Core i7
- Core i5
- Graphic Card UHD 770
- Graphic Card UHD 730
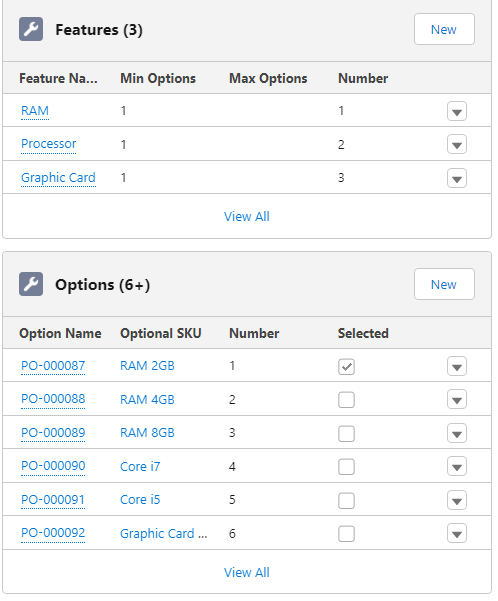
- Create 3 Features - RAM, Processor, and Graphic Card. Also, add all products in the Options.
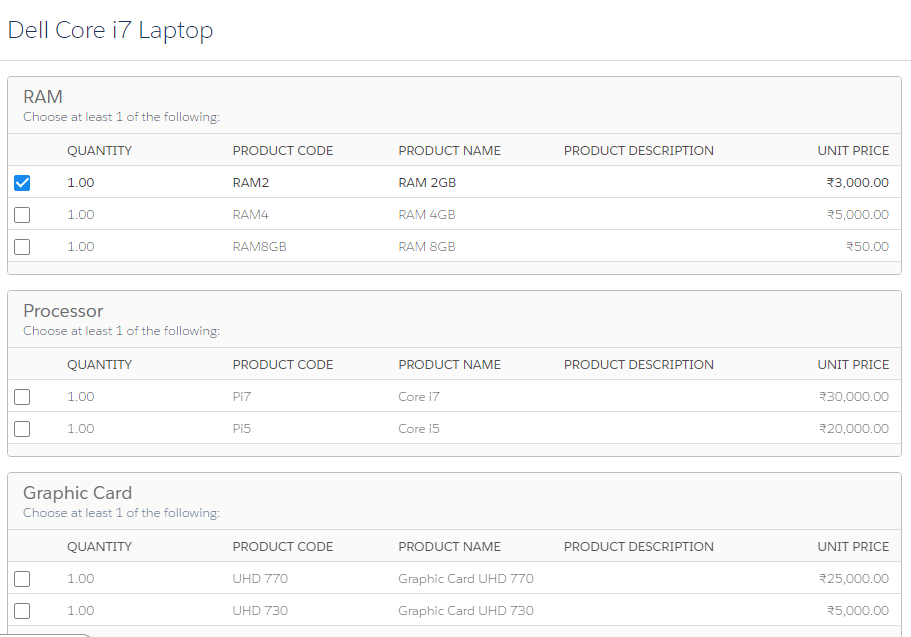
- After adding that bundle to the quote the QLE should look like this -
- Now our bundle is ready. Now the first use case is 2 GB RAM is only available with i5 Processor. let's see how we can configure this -
- Go to bundle product - Dell Core i7 Laptop bundle and click on the related tab.
- Under that tab, you will see a section for Option Constrain. Click on the New button.
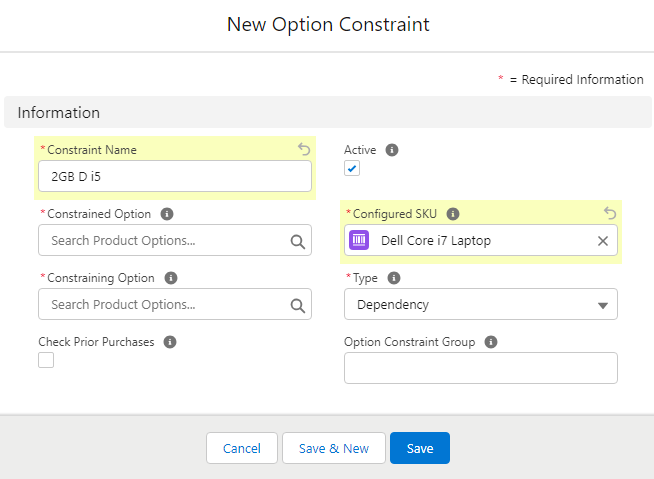
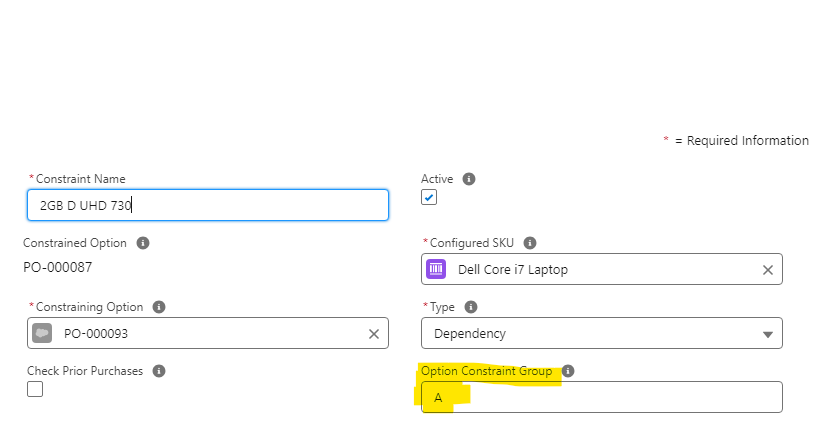
- You will see the following UI -
- Constrained Option (Slave field): This field is the dependent field, Like in our use case 2 GB RAM is dependent on the selection of the i5 processor. So here we need to fill PO(Product Option) number of 2GB.
Constraining Option (Master Field): This is the field on which the constrained option is dependent. Like in our use case, i5 Processor is the master field. Fill i5 in this field.
Configured SKU: The name of the bundle product.
Type: Select dependency here. and then save the record. - Now go to quote and add Dell Core i7 into QLE
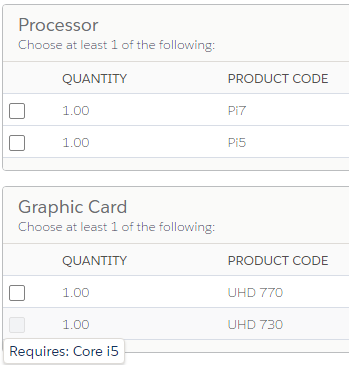
- Now as per the use case, Graphic Card UHD 730 is also available with an i5 processor only. Let's configure the OC again. Graphic Card UHD 730 will be the Constrained Option and i5 will be the Constraining Option. Other fields will remain the same as in step 5 save the changes.
- Go to the quote and add that product. You will see that processor is only enabled when i5 is selected.
Use of Option Constraint Group Field:
- If you check the screenshot attached after the above point 6, You will notice a field Option Constrain Group. Now whenever we have to apply more than 2 conditions in a AND logic then we will use Option Constraint Group Field.
- For Example: Enable Product A only if Product B AND Product C both are checked. In that case, we need 3 OC records and put a command value in the Option Constrain Group field for all 3 records. Let's check the below use case in order to understand this-
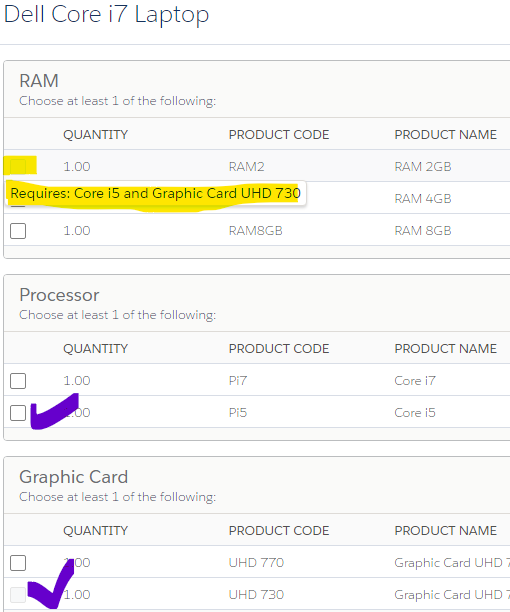
Use Case 2: 2GB RAM should only be available when i5 processor AND UHD 730 Graphic Card both options are selected.
Steps to configure Dependency OC (Use of Option Constrain Group):
- Go to the Dell Core i7 Laptop bundle product and click on the Related tab. Create a new OC record.
- This time we need to set 2GB RAM as a Constrained Option and UHD 730 Graphic Card as a Constraining Option.
- In the Option Constrain Group field put A.
- Now edit the other 2 OC records that we have added in the above use case and put A as Option Constrain Group. Save the changes and add that product to the quote.
Use of Check Prior Purchases Field:
Salesforce CPQ's Option Constrain record has the capability to check the old purchases of a user. Let's say Product A can only be sold if Product B is added to the quote line. But the customer already purchased product B before. In that case, if the Check Prior Purchase field is checked then the CPQ engine will check that allows the sales rep to add Product A without adding Product B in QLE.
2. Exclusion:
Exclusion constraints in Salesforce CPQ help prevent such conflicting combinations. By setting up an exclusion constraint, you specify which options cannot be chosen together. So, if a customer selects one option, the excluded options will automatically be disabled or removed from the available choices.
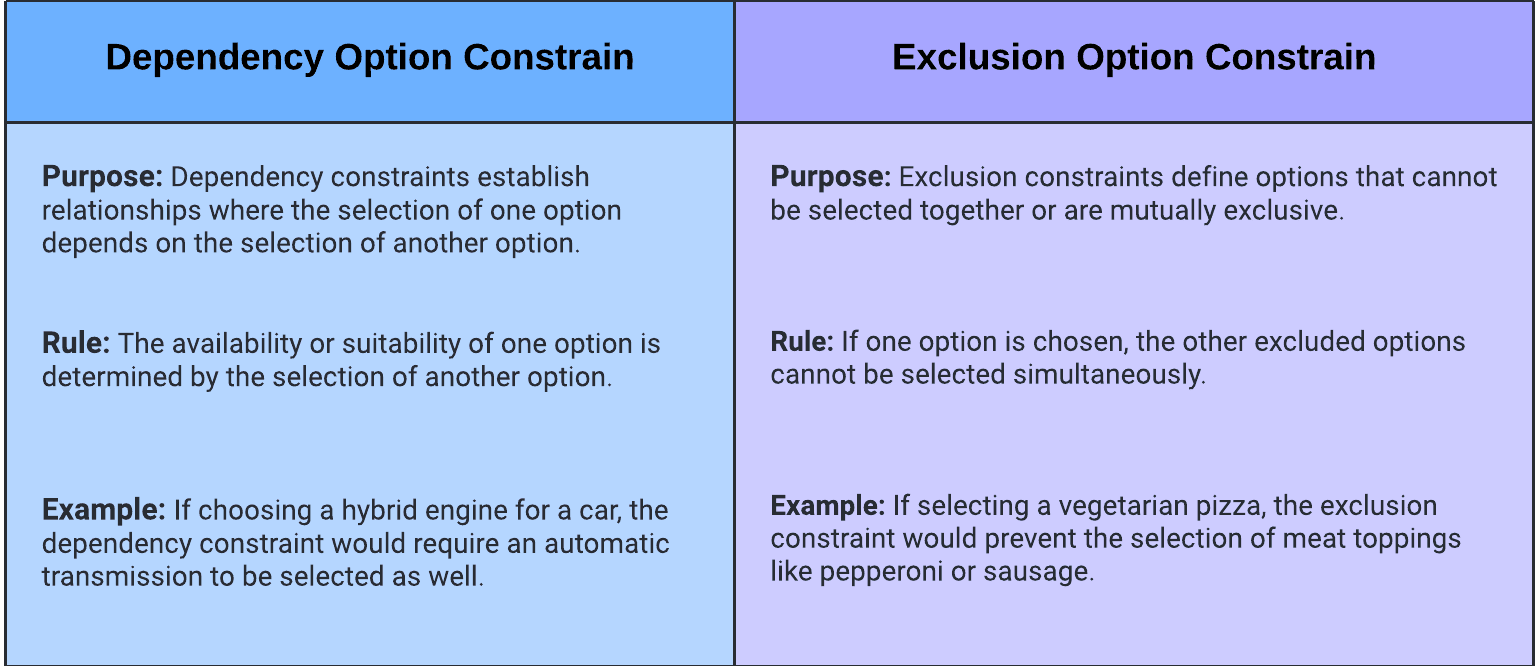
Before we start the setup of Exclusion OC, let's first understand the difference between Dependency and Exclusion OC
Difference between Dependency and Exclusion Option Constrain:
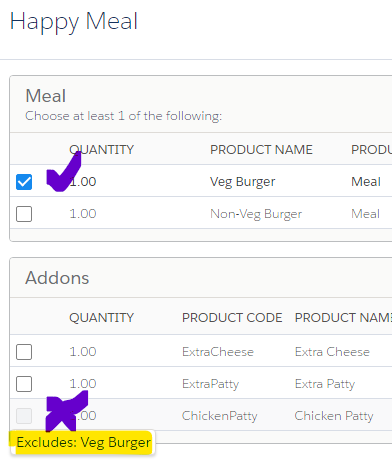
Use Case: In a Happy Meal bundle, if a veg burger is selected then all non-veg addons should be excluded from the selection.
Steps to Configure Exclusion OC:
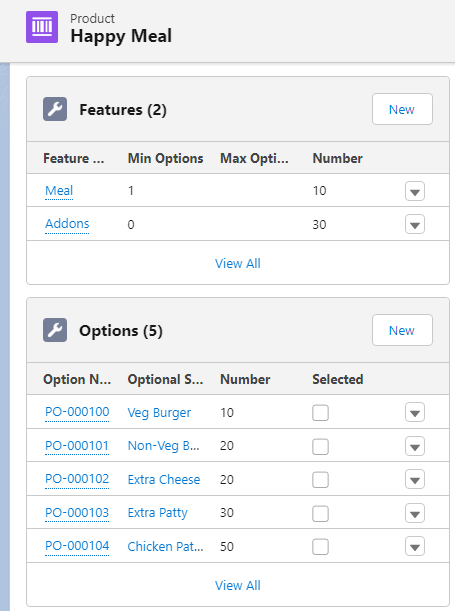
- Create a bundle (Happy Meal) with the following products -
- Veg Burger
- Non-Veg Burger
- Extra Cheese
- Extra Patty
- Chicken Patty
- Create two features as well Meal and Addons
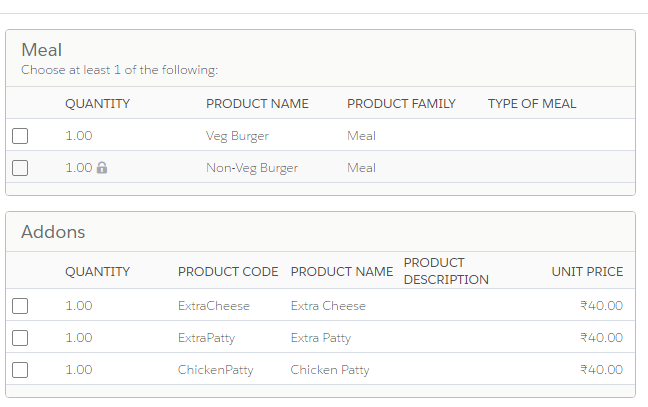
- Add that product to the Quote-
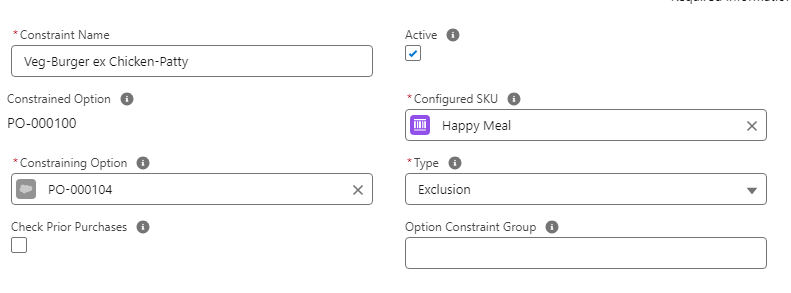
- Go back to the Bundle Product - Happy Meal and create an OC record -
Name -Veg-Burger ex Chicken-Patty
Active - true
Constrained Option- PO number of Veg Burger
Constraining Option- PO number of Chicken-Patty
Type - Exclusion
Save the record. - Go to Quote and add that record -
- Now you will notice when you select Veg-Burger, Chicken-Patty will be unchecked and vice versa as well.

