Custom Actions and Search Filters
- Enhance your Salesforce experience with the power of custom actions and search filters! By leveraging these remarkable features, you can effortlessly tailor the QLE and configurator to perfectly align with your unique business requirements
- Let's deep dive into Custom Action and Search Filters -
Custom Actions: Optimizing Your Sales Process
- Salesforce CPQ offers a powerful array of custom actions, which are action-oriented buttons. Custom Actions can significantly enhance your sales workflow.
- These dynamic buttons can be seamlessly integrated into various sections such as the QLE, configurator, or detail pages, providing your sales representatives with flexibility and efficiency.
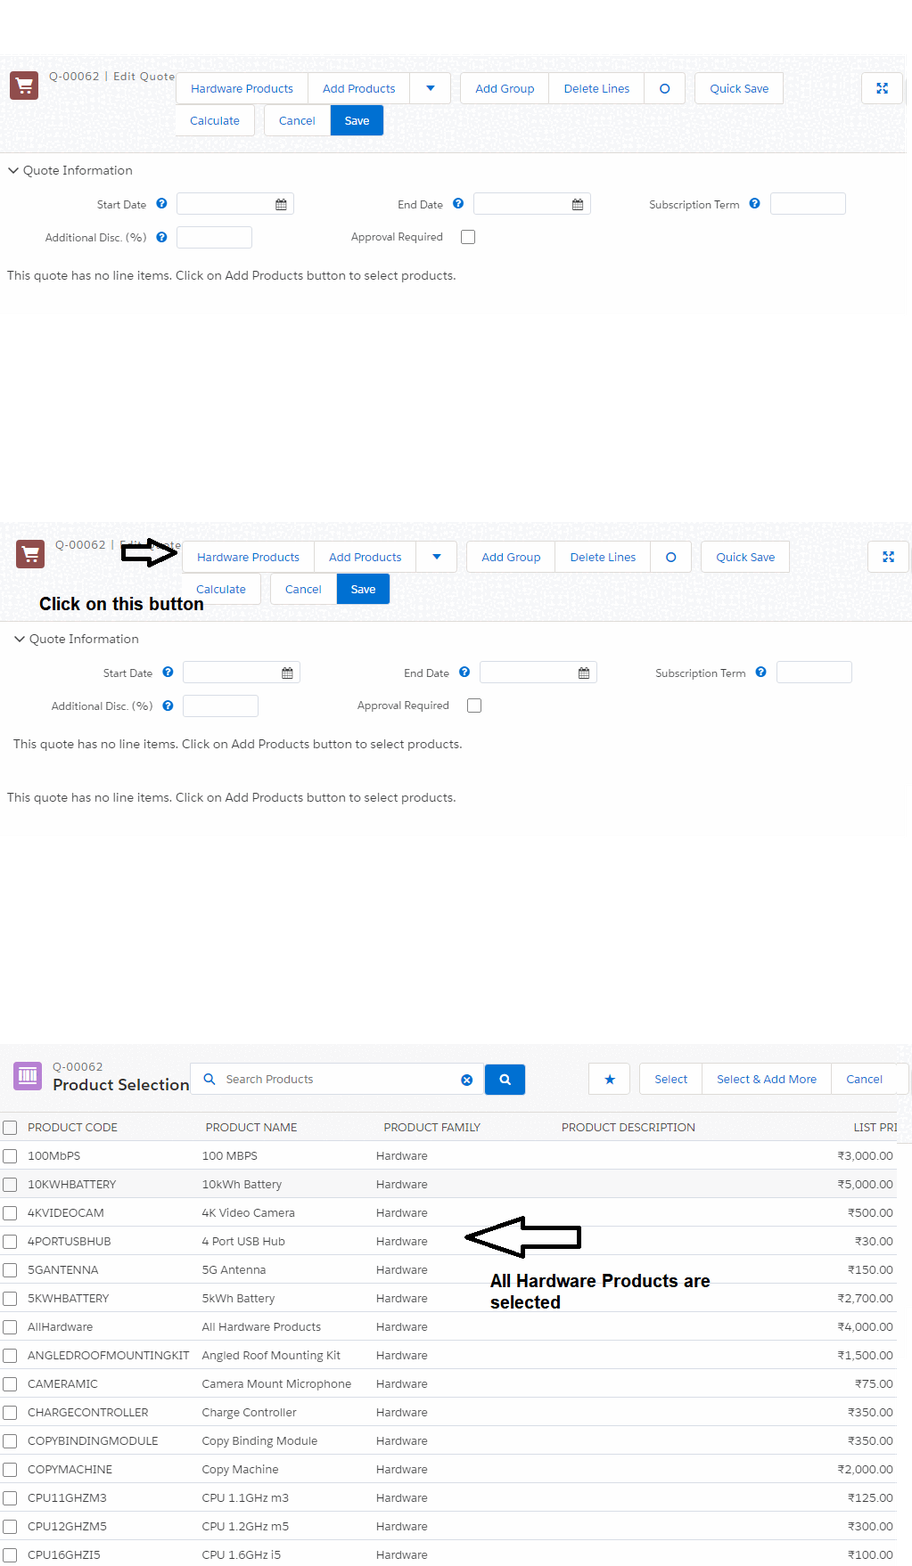
Show a button called "Hardware Product" Once clicked it should show all products where Product Family is Hardware.
Steps to Create Custom Action:
Before we follow the steps let's understand some important fields -
- Name: The name of the custom action.
- Display Order: Specifies where the custom action is displayed.
- Type: Determines whether the custom action is a button, menu, or separator. In this example, we are creating a button for service products. 3 Options - Button, Menu, Separator
- Parent Custom Action: If you want to group a child's custom action under an existing custom action, then you need to select this.
- URL Target: If your custom action is a URL, then you can provide the link here. You can give the VF page and Flow link.
- Page: This is where your custom action will be displayed.
- Location: The place where the custom action appears on the chosen page.
- Action: Determines the result of selecting a custom action. In this example, let's select Add Products.
- Label: Display the name in the QLE for the end users. Create a label picklist field in the custom objects by navigating to Setup Object Manager Custom Action Fields & relationship Label Values New. Add the new picklist value. In this example, we are adding Service Product. Once the picklist value is added, you can select that in the Label field here.
Add a new value in the Label field -Hardware Products and Save the record.
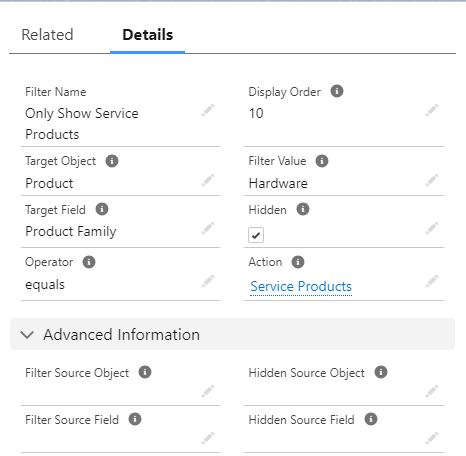
Now let's click on the related tab and under Search Filters click on the New button. Add the records with the following details -
Let's See how it is showing -
The Hardware Service button is visible to All Users. If we want to restrict this to some profile or add any other condition we need to create a new record under Custom Action Conditions.
Create a Search Filter:
Search filters are used to filter products based on the search criteria. Search filters can be created from custom actions.
Let's see the steps to create Search Filters:
- Go to the Custom Action tab
- Select the Action that we have created in the above steps - Hardware Products
- Click on the Related tab and under the Search Filter section, click on the New button and add the values as given in the screenshot-
Here make sure we have not checked the Hidden field. - Click on save.
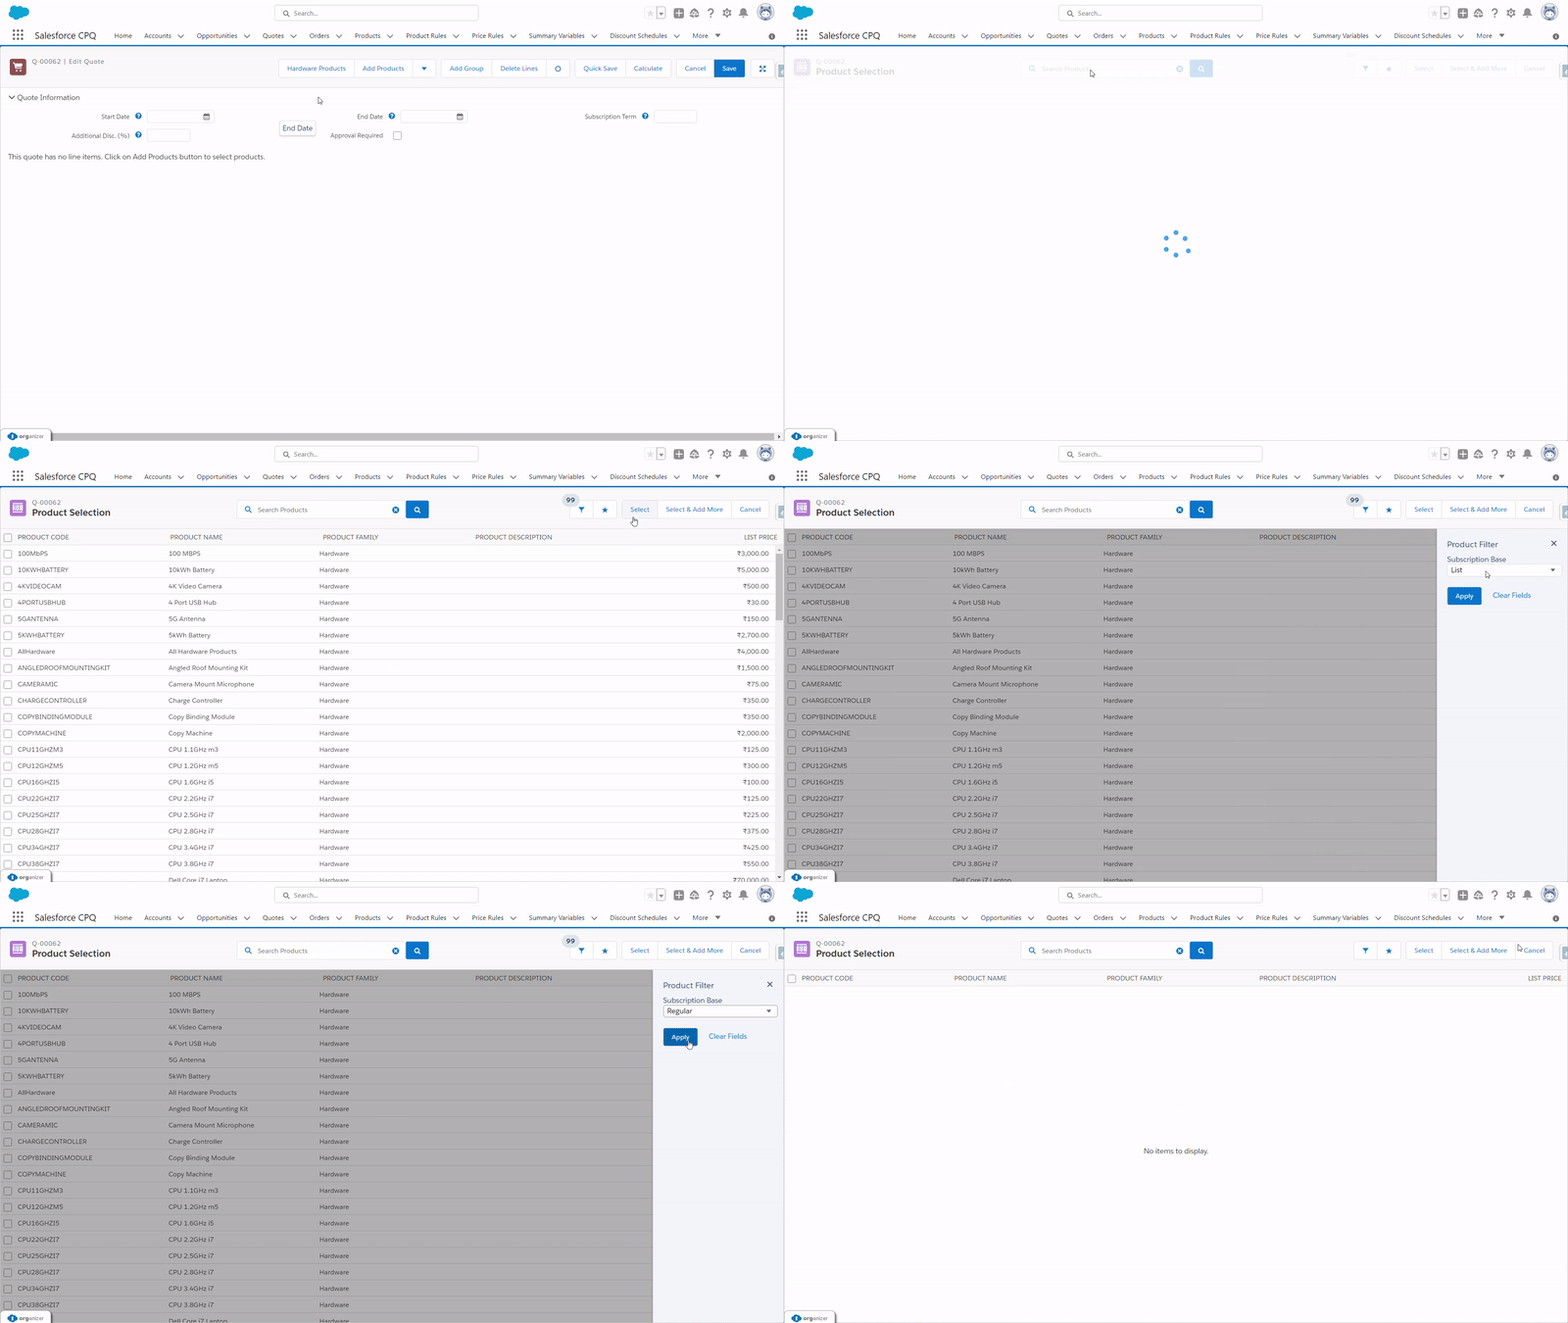
Let's check the demo -


